I am keen on the idea of a folding mast on my Able. The advantage I see with this is a dramatically reduced time to rig and pack up the boat. Here is a photo of a boat with the sort of folding mast that I envisage.
Nice boat isn't it, it is a Newport Lobster Boat belonging to Dave McCulloch.
To rig the boat the mast is pushed up into the vertical position and the forestay attached to the end of the bowsprit. The rest of the rigging, side stays, halyards, etc is already attached. The sail is unbundled and can be raised immediately. To pack up the sail is lowered and bundled around the boom. The forestay can now be released and the mast lowered and the boat is ready to go home. I expect the whole process or rigging or packing up to take 15 or 20 minutes instead of an hour or more.
For this idea to work the lower part of the mast has to be firmly supported so that it can't move. This can be done in several ways. It could be built in as a permanent part of the boat - this is probably the easiest solution but if it ever had to replaced some serious rebuilding of the boat would be involved. Another approach could be to step the mast on the keel and support it at deck level in a partner attached to the rear face of the large forward bulkhead. To do this the bulkhead would have to be moved forwards to maintain the correct position of the mast; the original design has the mast just in front of the bulkhead. Moving the bulkhead forward would reduce the volume of the forward buoyancy compartment and so this approach was abandoned. The approach adopted involves putting the base of the mast in a box inside the forward compartment. To keep the correct position of the mast the bulkhead has to move towards the stern by a few millimetres. As the top of the box would be open, allowing water to get in, it has to be sealed from the buoyancy compartment and drained into the cockpit.
To try and work out how this could be achieved I made a template showing the position of the mast and some of the supporting structure. Here it is in position behind the template for the bulkhead.
The photo below shows a closer view of the template, click on the photo to enlarge it.
At the top of the template you can see a horizontal pencil line across the 3 red lines. The intersection of the pencil line and the middle red line is where the pivot pin that supports the mast in the original design should be. This point has to be maintained on the centreline of the mast.
The 3 red lines on the template show the faces and centre of the mast at the correct rake (95 in 2000 or 38 in 800). Either side of the mast at deck level are the 65 x 25 deck beams.
The sides of the box will be 9 mm ply and the front and back will be 25 x 80. The geometry of the joints where the mast goes through the deck is going to be a bit tricky. The two fore and aft timbers that support the deck will need to be thicker than the design calls for because they go past the inner stem and samson post (65mm wide) and then come to the mast where they will have to be notched around the box (80mm for the mast and 2 x 9mm ply sides.
I will put a pad on top of the keel to spread the load from the mast a bit, the box sides will come down past it to meet the hull, all voids filled with epoxy!
In the next photo the finished bulkhead has been glued in place and the template showing the mast position put back in place. The block that the mast will stand on is visible at the bottom of the template.
The 2 longitudinal deck support beams have been fitted, below. The samson post is visible between them and the forward cross beam is in place. Note that the deck is cambered and the curve on the top of this beam is not the same as the curve across the top of the bulkhead, this is a trap for the unwary! None of these timbers has been glued in place yet.
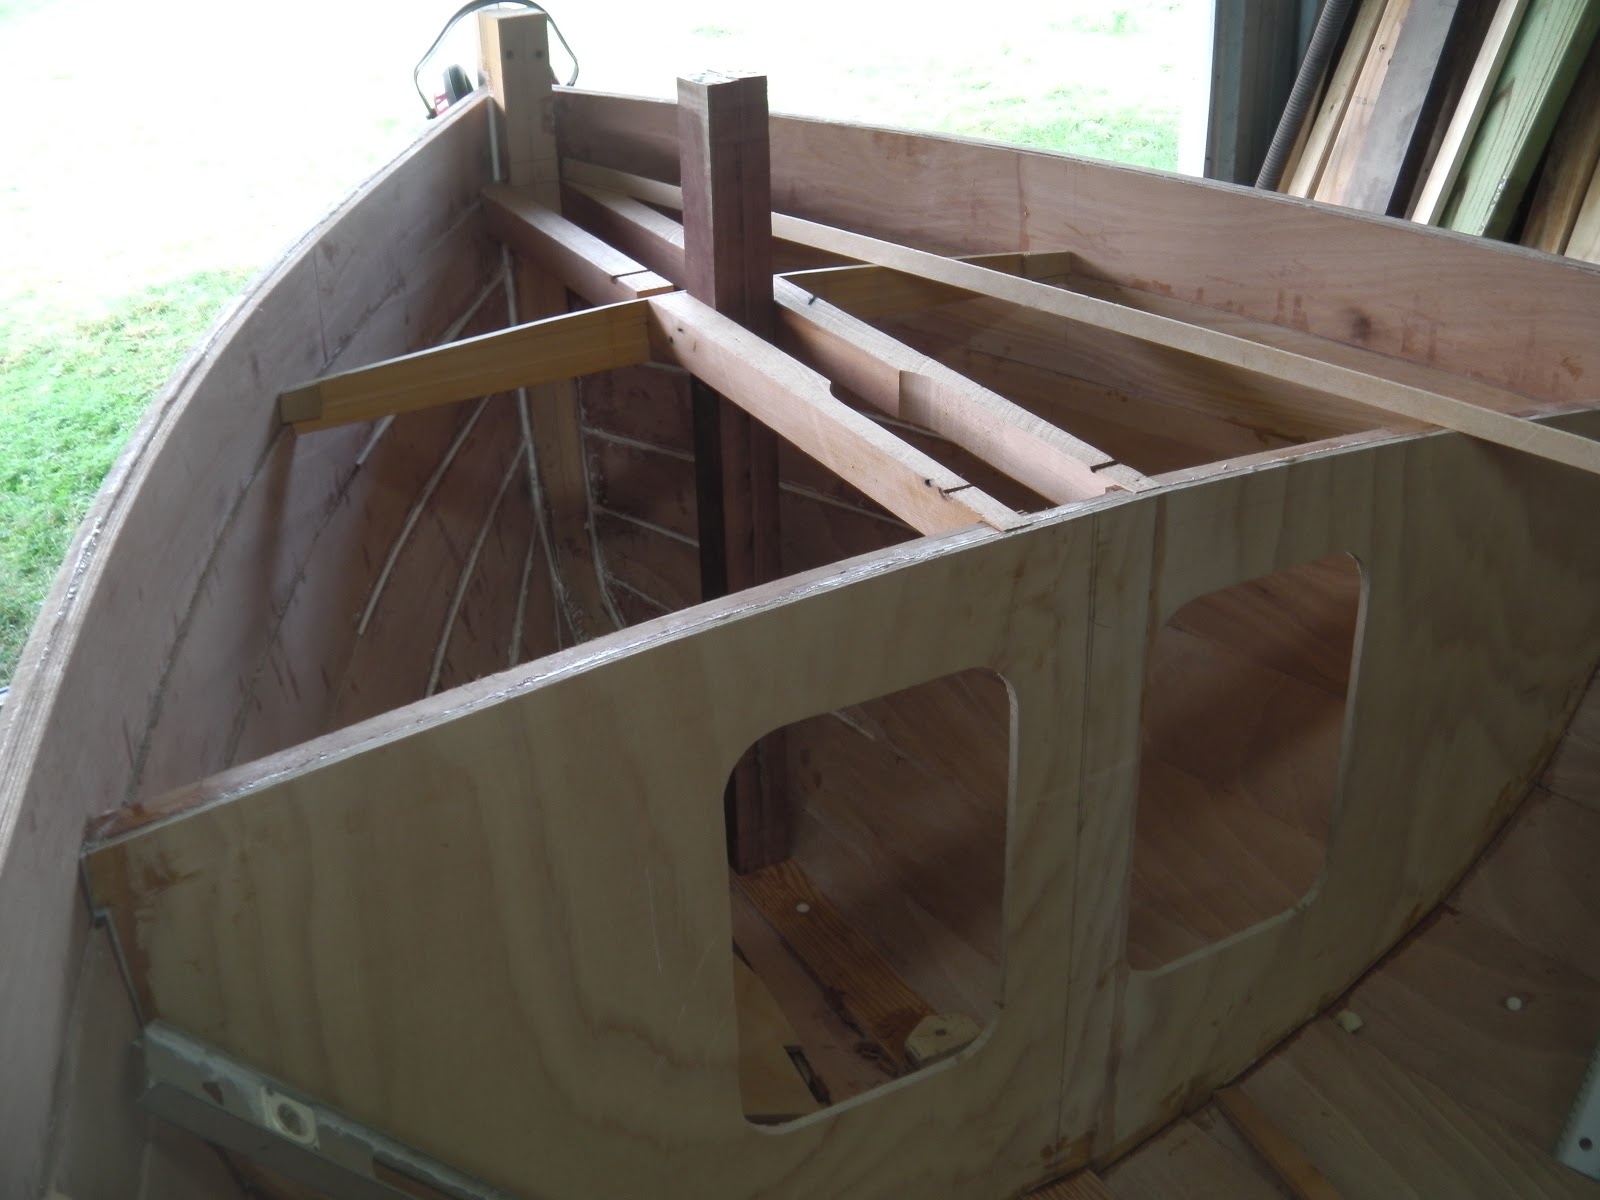
The next photo shows all the framework in place but not glued. I made a dummy mast out of scrap ply with a taper representing the rake of the mast (95 mm in 2000 mm) and wedged it in place in the the mast supporting box. The spirit level shows that the mast slopes backwards at the correct angle. Yippee!
Here is a view ot the bottom part of the mast support box.
After making a start on gluing the pieces of the framework in place, this will take a while because each lot of epoxt has to set before the next joints can be glued, I made a startof the forward seat fronts. The template can be seen on the fqar side of the boat and the finished, but not glued, nearn side seat front is in place with its supporting stringers.
At this point there is a lot of gluing to be done, of parts that already made, and I have to go buy more plywood and Oregon (Douglas Fir) because I have completely run out of both.