I'm building a boat to a design by Paul Fisher of Selway Fisher Design in the UK. The design is called "Able" and her vital statistics are: overall length 4.88m (16ft), beam 2m (6ft 6in) and design weight is 360kg (790lbs). You can read more about this design at http://www.selway-fisher.com/OtherDB.htm#KANE.

I intend to procede more slowly with this boat than I did with either of my other boat building projects (see links below on the right). This is, after all, a hobby and there are other things to do. So, updates to this blog might happen once every week or two. Come back and see.

If you would like to contact me please Click to Send me Email

Tuesday, 6 November 2012

Outside Of Hull Is Finished

Over the last few days the woodwork on the outside of the hull has been completed. Before I turn the boat over to work on the inside of the hull I am going to paint the outside. This will take quite a while because there is a lot to do before the painting starts. All the excess epoxy has to be cleaned off, all the sharp corners have to be rounded off, all the inside corners will have a fillet of thicked epoxy added and the whole has to be sanded and sanded and sanded!

With the sheer plank doublers in place, see the previous post, the rubbing strip and outer gunwale could be added. I did the rubbing strip first and made the mistake of putting the strips down the side of the hull first. This was a mistake because it made fitting the matching strip across the transom much harder as it had to fit exactly between the side strips. Not only that but it was curved and so had to be laminated in place. Here's the result (note that I am talking about the top strip without the clamps). There are three laminations, each had to be sprung into place  and then cut to length. Once fitted they were coated with glue and sprung back into position and then clamped. All very tricky and sticky!


Having made that mistake I added the strip to the transom to match the outer gunwale before the side pieces. I was able to apply more force to bend this one and made it in two laminations. Once the glue set I trimmed the ends of the strip flush with the sheer plank and put the outer gunwales in place. Here are some photos of the hull with all these pieces in place.


As I said, next job is to clean off the excess epoxy which is clearly visible in the photo above. Before I start on that though I am going to take my trailer sailer out for a couple of weeks sailing in the Great Sandy Strait. It will be sunny and hot but I am hoping for enough breeze to keep things reasonably cool and to keep the sand flies at bay!

Thursday, 1 November 2012

Sheer Plank Doublers Fitted

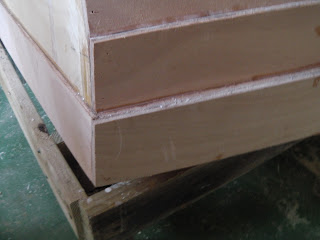
Over the last few days I have fitted the doublers to the sheer plank, it took a bit longer because I had to do them one at a time and also went sailing for a couple of days. Here are a couple of photos of the doublers at the bow and transom showing how they fit. The joints all look a bit daggy at this stage as the excess epoxy still has to be cleaned off (I get most of it before it sets so what is visible is the remainder).

 
Here, at the transom, the doubling is carried across the top of the transom.


Last photo shows the bow of the boat with all the planking now finished.


Next job is to add the rubbing strip to the lower edge and the outer gunwale to the the top edge of the sheer plank. I know, it's confusing - the boat's upside down so lower and upper, port and starboard are reversed!